
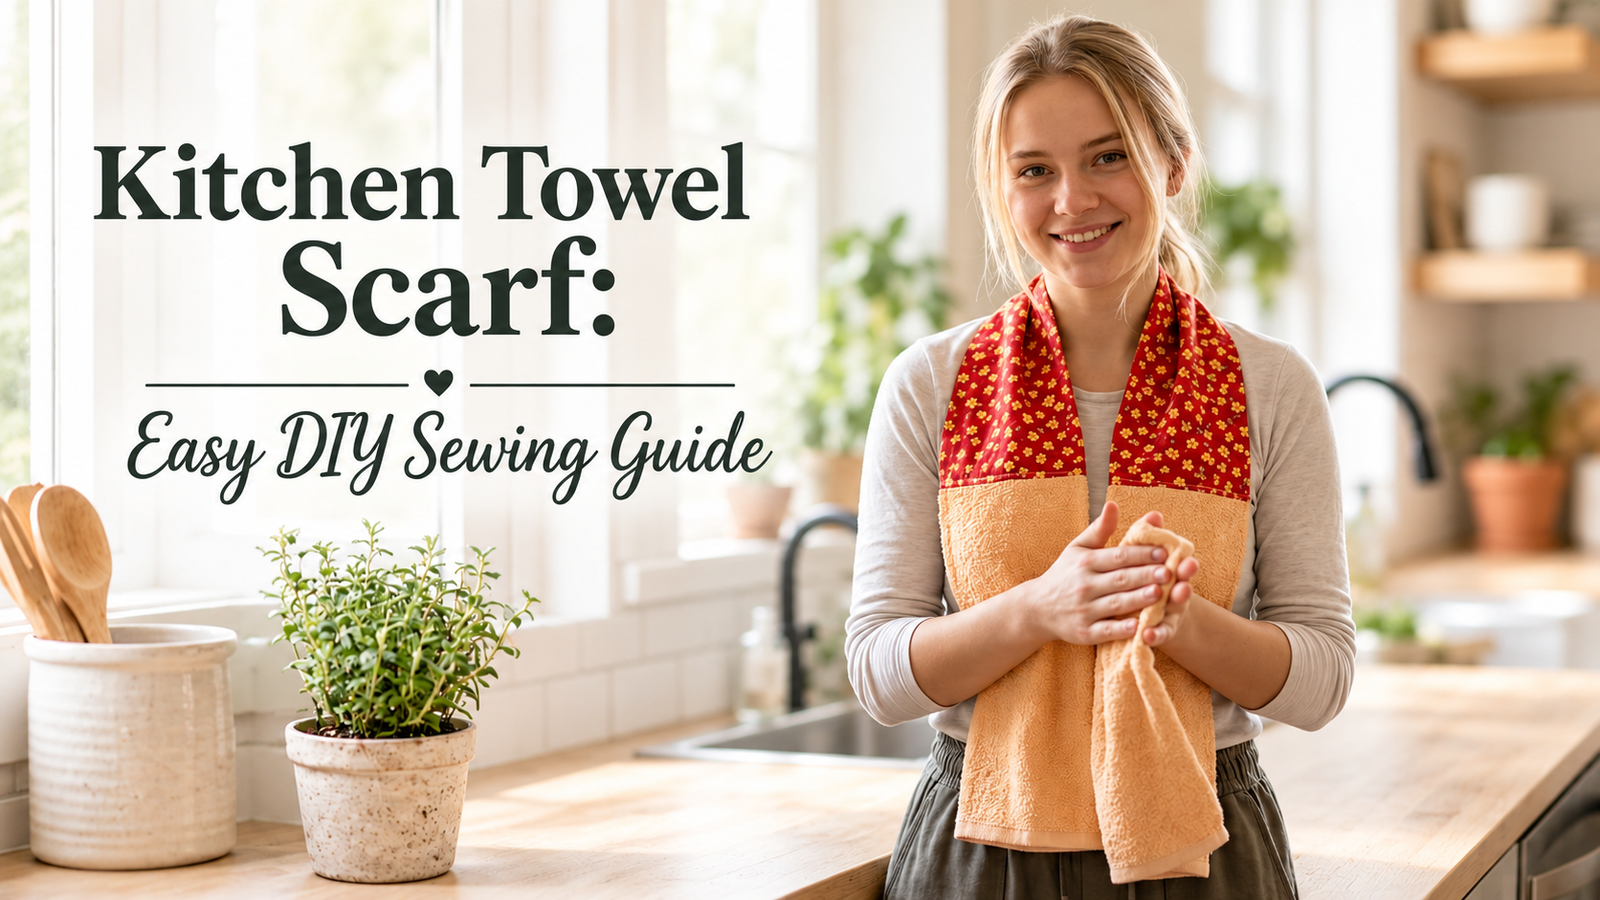
Have you ever started cooking or baking, only to realize that your kitchen towel is on the other side of the room? Or perhaps you have draped a dish towel over your shoulder, only to watch it slip off just when you need it most.
Meet the Kitchen Towel Scarf—a clever, wearable kitchen accessory that keeps two absorbent towels within easy reach while you cook, bake, and clean. It combines the comfort of a fabric neck section with the everyday usefulness of kitchen towels, making it a practical addition to any home kitchen.
The best part? You can make your own with basic sewing skills, a few fabric supplies, and a standard sewing machine. Whether you are looking for a useful weekend project, a thoughtful handmade gift, or a way to use up cotton fabric scraps, this beginner-friendly DIY is worth trying.
What Is a Kitchen Towel Scarf?
A kitchen towel scarf, sometimes called a kitchen boa, is a long fabric accessory worn around the neck. An absorbent towel hangs from each end, keeping both sides within easy reach as you move around your kitchen.
A well-made design includes three essential features:
- A comfortable neck section: A soft, washable fabric panel that rests around your neck without feeling bulky.
- Two absorbent towel panels: One at each end for drying hands, wiping small spills, and cleaning up during meal preparation.
- A handy hanging loop: A small sewn loop that lets you hang the scarf on a hook when it is not in use.
Unlike an ordinary dish towel, a kitchen towel scarf stays with you while you move between the sink, countertop, and baking station. You can also customize it with coordinating prints, seasonal colors, or leftover quilting cotton.
Why You’ll Love This DIY Kitchen Towel Scarf
1. Keep towels within reach
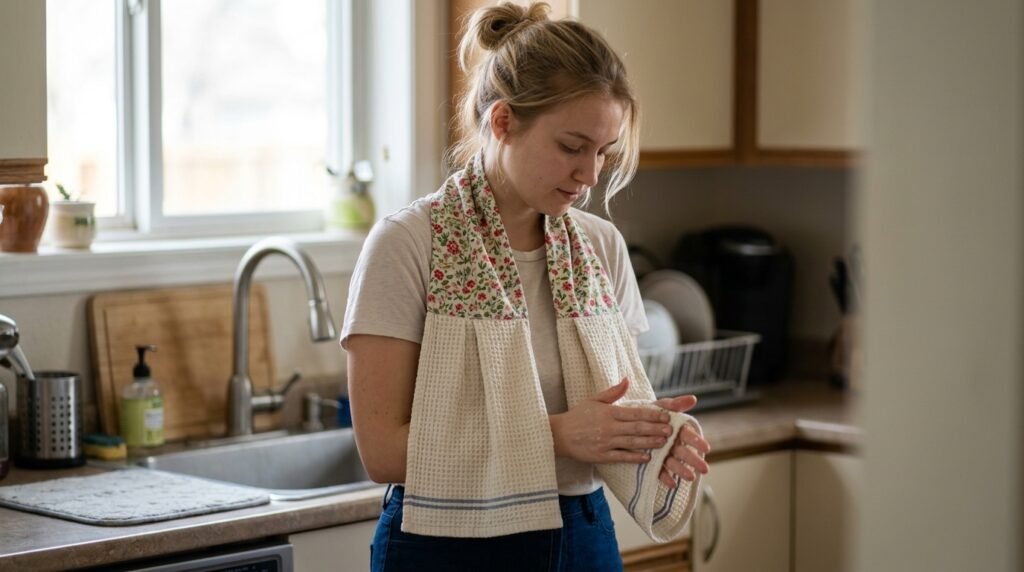
No more searching for a misplaced dish towel in the middle of a busy cooking session. Your towels travel with you.
2. Make everyday kitchen tasks easier
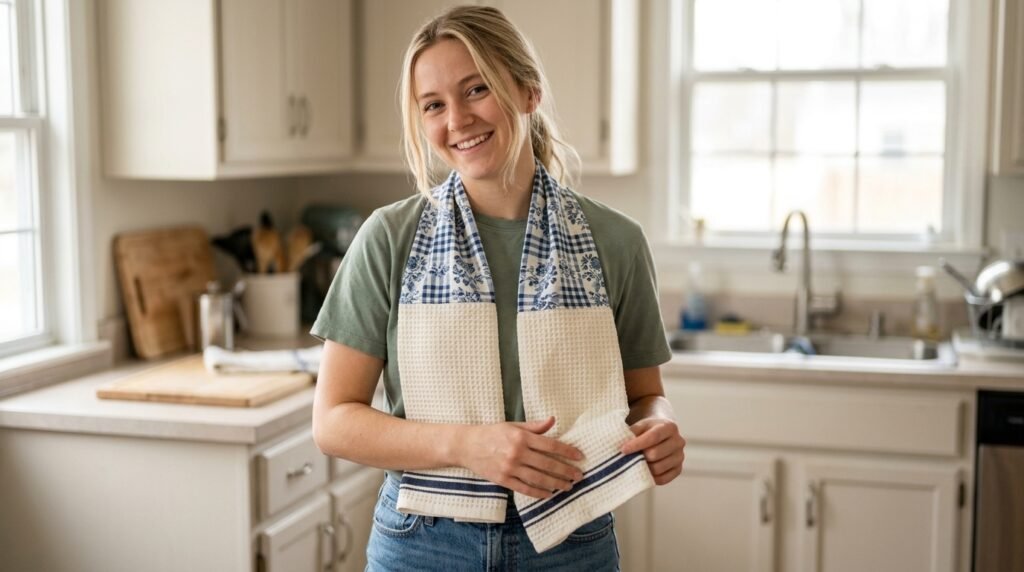
Use the towel ends to dry clean hands, wipe up small spills, or dry your hands between food-preparation steps. Keeping a clean towel nearby can make your kitchen routine more convenient.
3. Create a personalized kitchen accessory

Choose floral cotton, classic gingham, cheerful fruit prints, or neutral linen-look fabric. Your kitchen towel scarf can complement your apron, kitchen decor, or personal style.
4. Use fabric scraps creatively

The neck section does not require an elaborate pattern. Coordinating leftover quilting cotton can turn this simple sewing project into a colorful scrap-busting activity.
5. Make a useful handmade gift
A kitchen towel scarf is a thoughtful gift for home cooks, bakers, barbecue enthusiasts, and anyone who enjoys practical handmade items. Make a matching set for a housewarming, birthday, or holiday gift.
Materials and Tools You’ll Need
Before starting your kitchen towel scarf sewing project, gather the following materials.
Fabric and sewing supplies
- One medium-weight cotton kitchen towel, approximately 20 × 28–30 inches, to divide into two panels
- About ½ yard of woven cotton fabric for the neck section and hanging loop
- Matching all-purpose polyester or cotton-wrapped polyester sewing thread
- Optional lightweight fusible interfacing for extra structure in a particularly lightweight neck fabric
- A universal sewing machine needle suitable for your fabric thickness
For the best results, use a regular domestic sewing machine with a straight stitch and adjustable stitch length. Beginner-friendly models from brands such as Brother, Janome, and Singer are suitable for many projects like this. You do not need an advanced embroidery machine.
Essential sewing tools
- Fabric scissors: A sharp, dedicated pair of fabric shears, such as Fiskars fabric scissors, helps you cut straight, accurate edges without fraying the fabric unnecessarily.
- Sewing clips: Clips, including Clover-style Wonder Clips or similar alternatives, are especially helpful when holding thick or pleated towel layers together.
- Measuring tape and ruler: Use these to measure the neck section, towel panels, and hanging loop.
- Fabric marking pen or chalk: Mark the center points and seam positions before sewing.
- Iron and ironing board: Pressing each fold before stitching makes the fabric easier to handle and creates cleaner seams.
- Seam ripper and thread snips: These are useful for correcting small mistakes and trimming loose threads.
A steam iron is particularly helpful for pressing the neck fabric into a neat tube. Use a suitable temperature for each fabric, and avoid flattening textured towels more than necessary.
Choosing the Best Fabric for a Kitchen Towel Scarf
The right material makes a noticeable difference in how comfortable and useful your finished scarf will be.
Best fabric for the neck section
Choose a soft, washable, medium-weight woven fabric.
Quilting cotton is a great beginner option because it is easy to cut, press, and sew. It comes in countless prints and usually holds its shape well.
Other suitable options include:
- Cotton poplin: Smooth, lightweight, and comfortable around the neck.
- Cotton-linen blends: Attractive, breathable, and slightly textured.
- Lightweight cotton canvas: More structured, although a softer fabric may feel more comfortable around the neck.
Avoid very stiff, scratchy, or heavy fabrics that could make the scarf uncomfortable to wear. Prewash your fabric before cutting to help prevent unexpected shrinkage later.
How to choose absorbent kitchen towels
The towels are the functional heart of your kitchen towel scarf, so prioritize absorbency over appearance alone.
Waffle-weave cotton towels are a good choice because their textured construction makes them practical for regular kitchen use. Soft cotton terry towels are another option, provided they are not so thick that sewing through the layers becomes difficult.
Flat-woven cotton kitchen towels can also work well, especially when you prefer a slimmer design.
When shopping for towels, look for these qualities:
- Good absorbency and a soft, washable texture.
- Medium weight that folds and pleats without becoming too bulky.
- A sturdy weave that can withstand repeated washing.
- Colors and prints that coordinate with your neck fabric.
Avoid choosing a thick bath towel for this project. Excessive bulk can make the scarf heavy and difficult to sew. Skip fabric softener when laundering towels if absorbency is a priority, and test a small section of any unfamiliar towel before committing to the project.
How to Make a Kitchen Towel Scarf: Step-by-Step Sewing Guide
This beginner-friendly method uses one kitchen towel divided into two panels, a long cotton neck section, and a small fabric hanging loop.
The measurements below are a starting point, so adjust them to fit your body, towel thickness, and preferred scarf length. If you purchase a sewing pattern, follow its supplied measurements rather than combining them with these DIY dimensions.
Step 1: Prepare Your Fabric and Towels
Wash and dry your cotton fabric and kitchen towel according to their care instructions. Press the main fabric so it lies flat, and trim away loose threads or bulky labels from the towel.
For the neck section, start with a fabric rectangle approximately 42 inches long × 10 inches wide.
Measure your kitchen towel before cutting. If it is approximately 20 × 28–30 inches, cut it across the middle of its length to create two pieces measuring roughly 20 × 14–15 inches.
Each half will become one of your hanging towel panels.
Step 2: Sew the Comfortable Neck Section
Fold the long fabric rectangle lengthwise with the right sides facing each other.
Clip the long edges together, keeping them aligned. With your sewing machine, stitch along the long edge using approximately a ½-inch seam allowance.
A regular straight stitch is sufficient. Backstitch at the beginning and end of the seam to secure the stitching.
Next, carefully turn the fabric tube right side out. A turning tool or a blunt-ended helper can make this easier, especially if your fabric is narrow.
Press the tube flat, positioning the seam neatly along one edge or underneath, according to your preferred finish. Fold the short ends inward by about ½ inch and press them in place.
You now have a long, soft fabric section ready to receive the towels.
Beginner tip: Test your stitch length on a fabric scrap first. The goal is a secure seam that lies flat without puckering.
Step 3: Prepare the Two Absorbent Towel Panels
Lay the first towel piece flat and identify the freshly cut edge. This edge will be attached to the neck section.
The towel needs to be narrower where it joins the fabric, but the hanging portion should remain wide enough to be useful.
Create neat accordion folds or pleats along the cut edge until it fits the opening of the neck tube. Aim for a finished attachment width of approximately 4–5 inches, adjusting as necessary to match your neck section.
Use sewing clips to keep the folds in place. Stitch across the pleated raw edge about ¼ inch from the edge to secure the folds temporarily.
Repeat this process with the second towel panel.
Absorbency tip: Keep the hanging portions of the towels as full as possible. Pleat only the attachment edge instead of folding the entire towel into a narrow, bulky strip.
Step 4: Attach the Towel Panels to the Neck Section
Insert the pleated edge of the first towel about ¾–1 inch into one open end of the fabric tube. Make sure the raw edge is hidden inside the neck section and that the towel hangs in the intended direction.
Clip all the layers securely. Stitch across the end of the fabric tube, catching both sides of the tube and the pleated towel edge.
Sew slowly through the thicker layers, keeping your fingers away from the needle. If needed, use the hand wheel to help guide the needle through particularly bulky sections, following your sewing machine’s instructions.
Backstitch at the beginning and end for extra security.
Repeat the same process with the second towel at the opposite end.
Before continuing, gently tug each towel panel to check that it is securely attached. If the fabric shifts or the stitching misses a layer, unpick the affected section and sew it again.
Step 5: Add the Hanging Loop
The hanging loop makes it easy to store your scarf on a kitchen hook when you are not wearing it.
Cut a small strip of matching fabric approximately 5 inches long × 1 inch wide.
Fold the strip lengthwise, open it, and fold both long edges toward the center crease. Fold the strip again so the raw edges are enclosed, then press it flat.
Stitch along both long edges close to the edge to create a sturdy fabric loop.
Position the loop at the center of the neck section, where it can be used for storage without interfering with the towel panels. Place the loop ends against the fabric and stitch them securely using a small reinforced rectangle or another suitable reinforcing stitch.
Keep the loop short and unobtrusive so it does not become bulky or uncomfortable when the scarf is worn.
Step 6: Finish the Edges and Inspect Your Sewing
Now it is time to give your kitchen towel scarf a neat, durable finish.
Check that all raw edges are enclosed, the towel panels hang evenly, and there are no loose threads. If any stitching has left a raw edge exposed, turn it under and stitch it neatly.
Press the cotton neck section once more using an appropriate iron setting. Finger-press the towel attachment seams if the towel texture makes ironing difficult.
Inspect the stitches around both towel panels and the hanging loop. Add reinforcing stitches if necessary, particularly if you expect to use the scarf frequently.
Finally, gently pull each component to check its stability, then launder the finished item before its first use according to the fabric care instructions.
Congratulations! Your DIY kitchen towel scarf is ready for the next cooking or baking session.
Want a Printable Pattern Instead?
If you prefer a structured pattern with prepared measurements and printable instructions, take a look at the Kitchen Towel Scarf sewing pattern from SewMore Patterns.
The downloadable PDF pattern is designed around a comfortable neck wrap, two hanging kitchen towels, and a convenient hanging loop. It includes print-ready files and guidance for assembling the pattern, making it a helpful option if you would rather follow a dedicated template than measure everything yourself.
Before purchasing, check the listing’s printing instructions and fabric requirements to make sure the pattern suits your needs.
Practical Ways to Use Your Kitchen Towel Scarf
Once your scarf is complete, you will find plenty of opportunities to use it during everyday kitchen tasks.
While cooking: Keep a clean towel nearby for drying washed hands, wiping small splashes from the countertop, or drying utensils that are ready for use.
While baking: Use one towel end to dry clean hands after washing, then switch to the other as needed. Keeping separate clean towels within reach can help you organize your workflow.
During meal preparation: Having both towel panels available is convenient when alternating between washing vegetables, handling ingredients, and tidying your workspace. Always follow safe food-handling practices and use fresh towels when they become soiled.
While hosting or entertaining: A coordinated kitchen towel scarf is both useful and visually appealing. Choose fabric that complements your apron for a put-together cooking outfit.
For camping or outdoor cooking: A lightweight version is easy to pack and gives you a convenient way to keep towels accessible at a campsite or outdoor preparation station.
Remember that a kitchen towel scarf is designed for wiping and drying, not as protective equipment. Never use it as an oven mitt, pot holder, or protection when handling hot cookware. Wet fabric and thin cotton layers do not provide reliable heat protection.
Tips for a Professional-Looking Kitchen Towel Scarf
Small details can make a beginner sewing project look much more polished.
- Press as you sew. Pressing each fold before stitching helps the fabric stay in place and gives the neck section a cleaner appearance.
- Use clips for thick towel layers. Clips hold pleats securely without making it difficult to sew through the folded fabric.
- Choose thread that complements your fabrics. Matching thread creates a subtle finish, while contrasting thread can add a decorative detail.
- Test the scarf length before final stitching. Check how the neck section sits on your shoulders and make sure the towels hang comfortably in front of you.
- Reinforce stress points. The attachment seams and hanging loop experience repeated pulling, so secure stitching is essential.
- Keep the neck area comfortable. Avoid excessive interfacing or very thick seams where the fabric rests against your neck.
Frequently Asked Questions About Kitchen Towel Scarves
Is a kitchen towel scarf suitable for sewing beginners?
Yes. A kitchen towel scarf is a useful beginner project because it mainly involves straight stitching, folding, pressing, and attaching fabric layers. Taking time to measure accurately and secure the towel pleats makes the process much easier.
What is the best fabric for a kitchen towel scarf?
Medium-weight quilting cotton or cotton poplin works well for the neck section because these fabrics are washable, easy to sew, and comfortable to wear. For the towel panels, cotton waffle weave, flat-woven cotton, or lightweight terry offers practical absorbency.
Can I use two separate kitchen towels instead of cutting one towel in half?
Yes. Two matching or coordinating towels can work as long as they are a manageable thickness and can be folded neatly where they attach to the neck section. Measure both towels and adjust the attachment folds to keep the finished scarf balanced.
Do I need a special sewing machine?
No. A standard domestic sewing machine with a straight stitch is usually enough for this project. Use a suitable needle and sew slowly through thick towel layers. Consult your machine’s instructions if it struggles to feed the fabric evenly.
How do I wash a kitchen towel scarf?
Follow the care instructions for the fabrics you selected. Most cotton versions can be machine-washed, but pre washing fabrics before sewing helps reduce shrinkage surprises. Wash promptly when soiled, dry thoroughly, and avoid leaving damp towels bunched together.
Is a kitchen towel scarf a good handmade gift?
Absolutely. It is practical, customization, and suitable for people who enjoy cooking or baking. Pair it with coordinating dish towels or an apron for a thoughtful handmade kitchen gift.
Make Your Own Kitchen Towel Scarf Today
A kitchen towel scarf is proof that a small sewing project can make an everyday routine more convenient. With a comfortable neck section, two absorbent towel panels, and a simple hanging loop, you can create a useful accessory that looks good and works hard in your kitchen.
Choose cotton fabrics you love, prepare your towel panels carefully, and take your time with the seams. Even if you are new to sewing, this project gives you an opportunity to practise essential skills while making something you can use every day.
Ready to get started? Gather your materials, set up your sewing machine, and make a kitchen towel scarf that is uniquely yours. Or explore the SewMore Patterns Kitchen Towel Scarf pattern for a printable guide to help you along the way.